§ Phase 3 — finishing.
4/27/09
Ok - so, this still qualifies as construction, really. It’s just construction that I’m directly involved with, and is happening from the studs inward, ultimately ending in finishing.
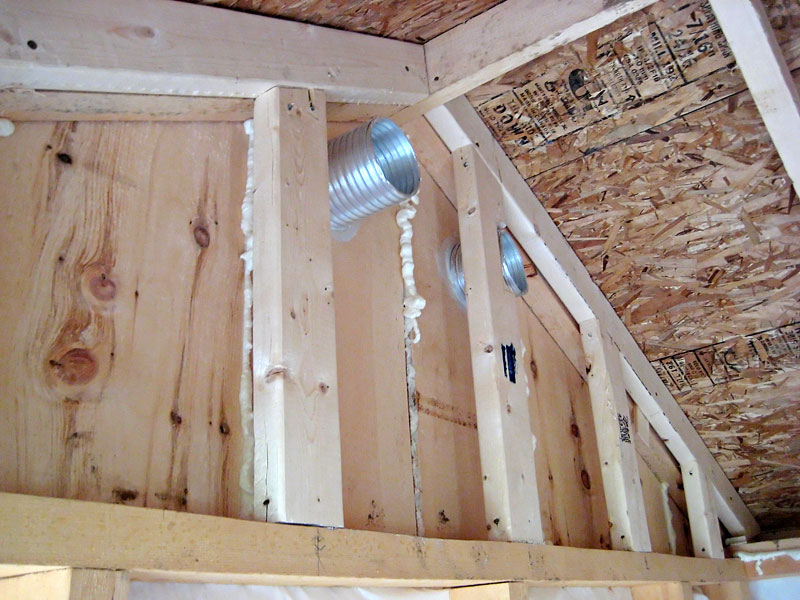
With significant help from dad, there is now framing in the cornices to support the eventual walls leading up to the eventual vaulted cieling. They’re basically fancy nailers. Also visible here is some urethane foam (Dow “Great Stuff”) I was experimenting with to seal the backs of the battens, and some metal dryer hose for ventilation.
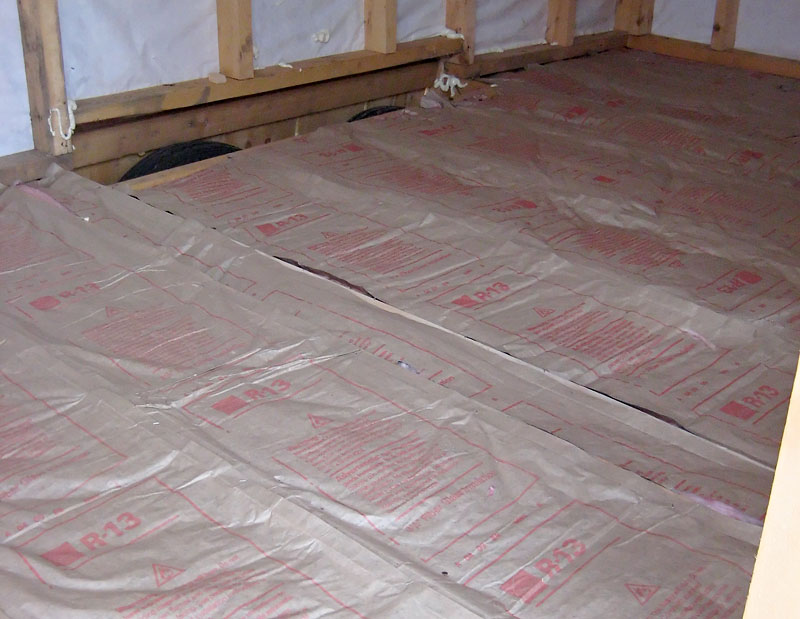
Largely for reasons of expense, I’ve decided to go with plain, old fiberglass for the subfloor insulation. The bottom is now totally sealed off from beneath, and from the top with the aforementioned foam, so all should be well. Speaking of the foam - notice the stray globs of it everywhere. I went nuts with it, because I learned something crucial about this stuff. It’s meant to be used a whole can at a time, because it seals its own delivery tube. I did clean one out once, but it was a nightmare. I suspect this is why the displays at the home stores have the tubes missing from half the cans. Anyway, it all adds up to putting it even into nonsensical places out of a desire to avoid wasting most of it.
Also, you can see that I decided the wheel-wells William built weren’t quite what I wanted, so they’ve been ripped out. Dad has a plan for better ones.
5/4/09
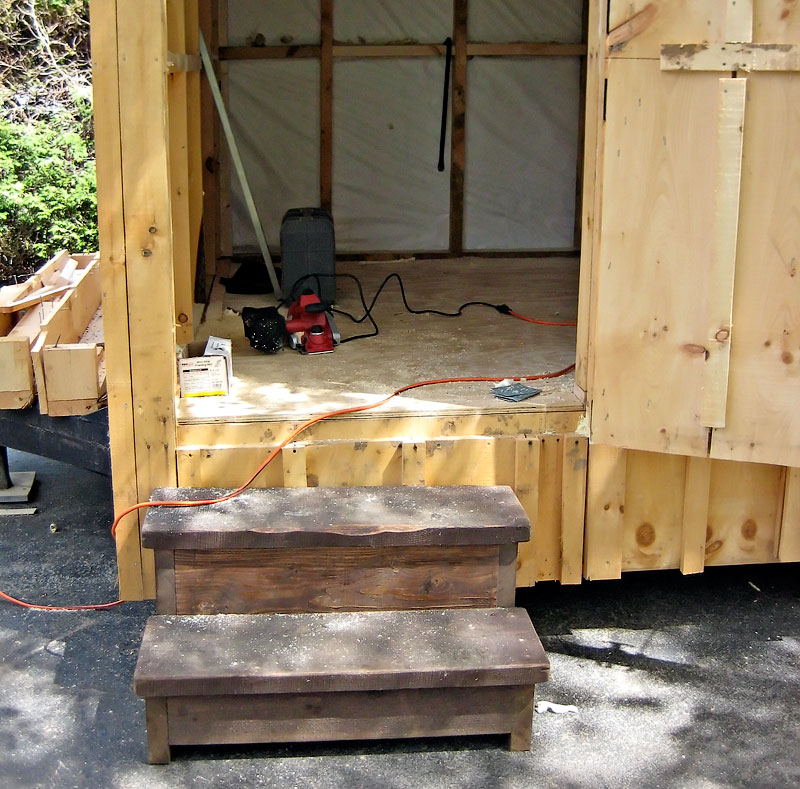
Last Tuesday Dad surprised me greatly. He phoned a friend and during the day they installed the plywood part of the floor. I arrived home from work to find it done. WOO HOO!! You can see that, and the stairs he built weeks ago along with sundry tools in this photo;
After that, things pretty much sat idle until the weekend - and wow, what a productive weekend. Still, it seems as if so much more could have been done.
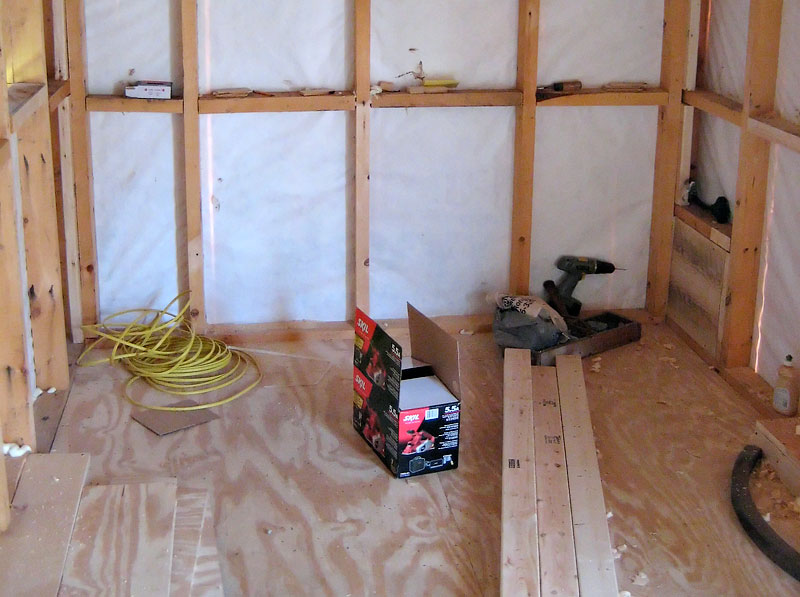
Anyway, Dad pronounced the tolerances on the interior studs to be grotesquely out of whack. This necessitated picking an arbitrary standard, and then either planing the studs down, or adding shims to build them up so that when the wall paneling is put on, it’s not bulging horribly in an expresison of non-Euclidean geometry. After trying my hand with a chisel, and my arms with a normal planer, Dad and I went to Lowes and bought an electric one. At this point, I’m all about spending money to save time. Here’s a random interior shot with tools and junk;
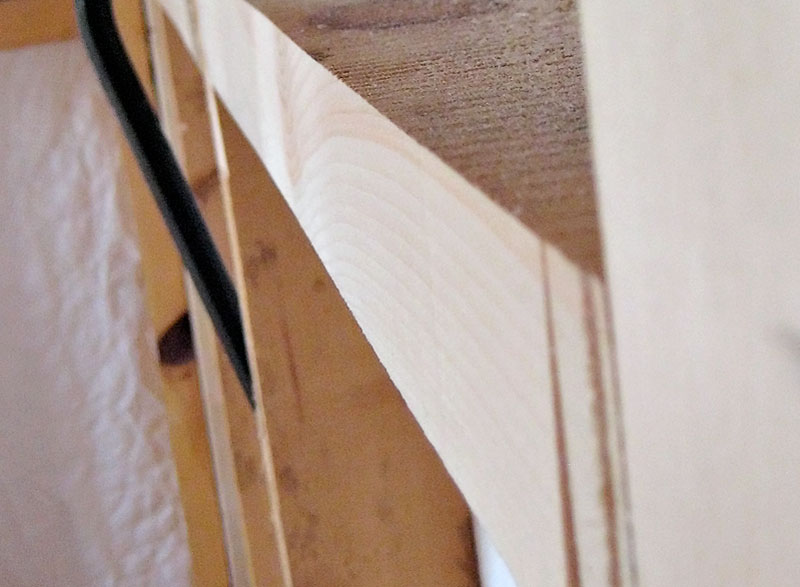
And here’s a tight shot of a planed stud. Not cosmetic, but who cares? It took perhaps a minute to shave it down to where it needed to be, and that’s one less bulge in the eventual wall. All in all, I think the expense of the planer may have saved days of effort - days I can ill afford.
We also completed the rebuild of the wheel-wells. That took far longer than anticipated, once again due to the seemingly random irregularity of the frame construction. I very much doubt that Farmer William had the same mental image of the interior that I did, or he almost certainly would have done a few things differently.
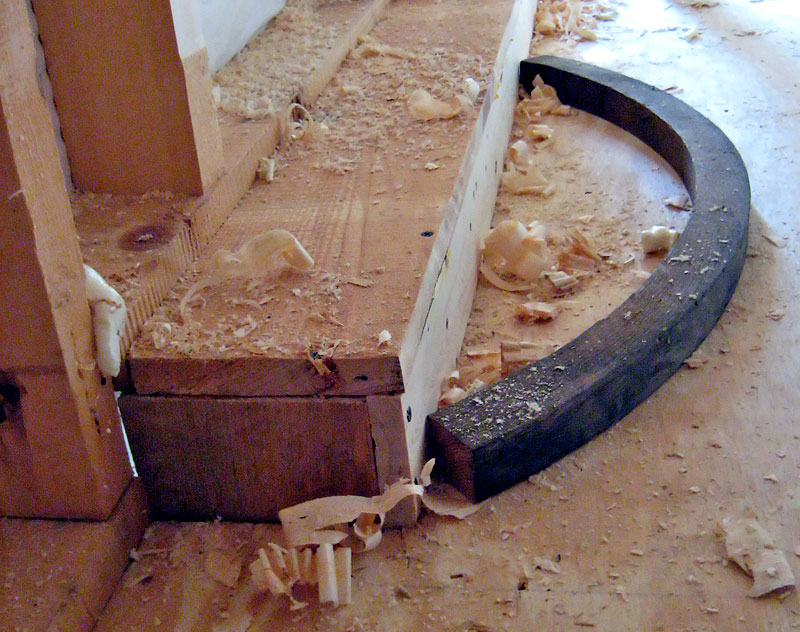
Without a before shot, it’s not all that obvious, but trust me - these are far less intrusive than the massive things he had put there. Also notice the nifty piece of bent oak lying amongst the shavings. That will eventually be part of the interior trim, and will be the subject of future photos.
5/15/09
So - not as grandiose an update as I had planned, but the interior beams have proven to be more work than I had imagined. These will be the subject of a future update, hopefully after this weekend. In the meantime, here’s the wiring for the electricity, speakers, and chandelier!
(Yes - you read that correctly. Many people have expressed surprise at this concept. Apparently they had no idea the extent of my evil plans.)

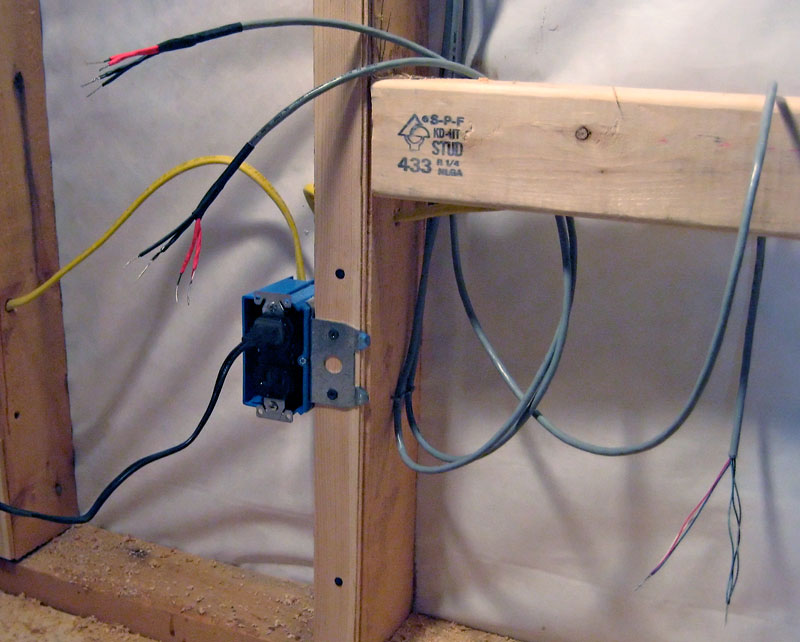
Remember that little access panel that looked like a tiny window toward the rear of the structure? It now has a very beefy male electrical plug dangling from it, which connects to standard house wiring inside. Last Sunday, my friend Ogre came over and helped. He’s exceedingly tall, and was easily able to drill through studs all the way to the peak of the roof. Unexpectedly, he had also done this before, and I just gave him carte blanche to do the wiring. All I really did was some soldering and sundry wire-yankage. When it was all over, the outlets were wired perfectly, and the supply lines for the speakers and the chandelier were all in place. Woo hoo!
Below, you’ll see a representative outlet, the lines for both the front and rear speakers draped over a stud, and the eventual supply line for the chandelier just hanging. The grey wire is some decade-plus old RS-232 serial cable I salvaged from work. Once the ends are finished the way they need to be, they’ll all just curl up into a box in the wall until ready for use, whereupon the amp and chandelier power supply will just hide under my bed.
And here you can see one of the speaker mounts just press-fit between the studs nearest the door. This was before they were permanently mounted. They all have fiberglass behind them now for acoustic damping, protection from condensation (hopefully) and to prevent the eventual blown foam from intruding.

5/17/09
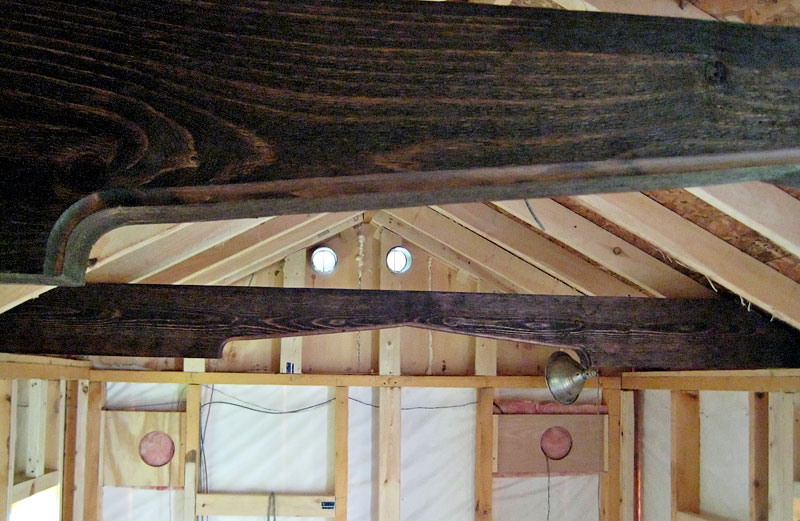
After much ado, the new beams are nearly finished. For reasons of cost, they had to be pine. On Dad’s advice, I decided to buy rough-cut from a local sawmill on the cheap, and glue 3, 1-inch planks 8” wide by 8’ long into 3” beams. This we did, essentially making gigantic pieces of plywood. These we then planed. Not content with straight lines, however, and wanting to accommodate taller people, I decided arches were the way to go. You can see the nice, shouldered Tudoresque arch in the picture below.
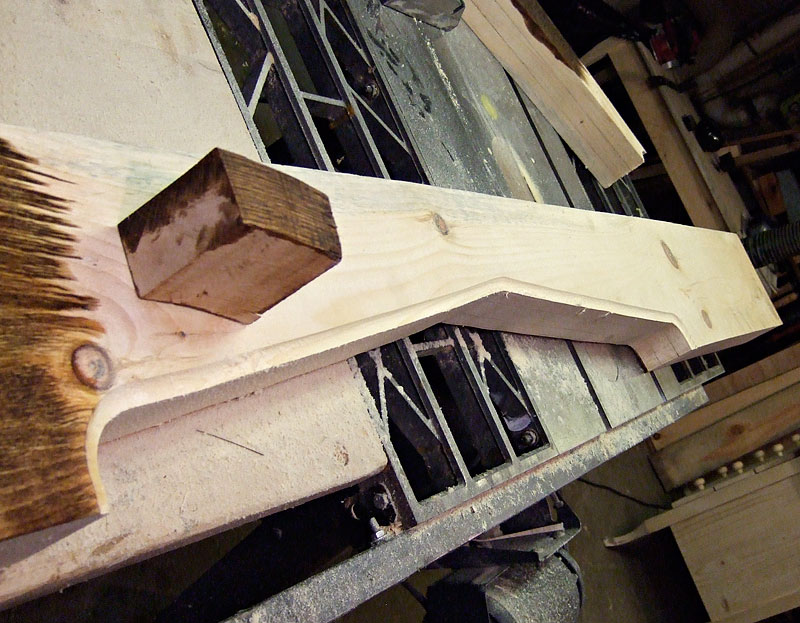
Of course, even that isn’t sufficiently simple for me. There are pieces of bent oak involved, and these beams need to match them as much as possible. This is not an easy thing to do with pine, unfortunately. Thankfully, I’m resourceful. With a wire-wheel and a drill, I spent my morning wire-brushing every visible square-inch of my pine beams. After some color tests, I decided to then stain them with ‘Golden Pecan’ as a base color, and then go over them with “Special Walnut” as a final color. The secondary test can be seen below.
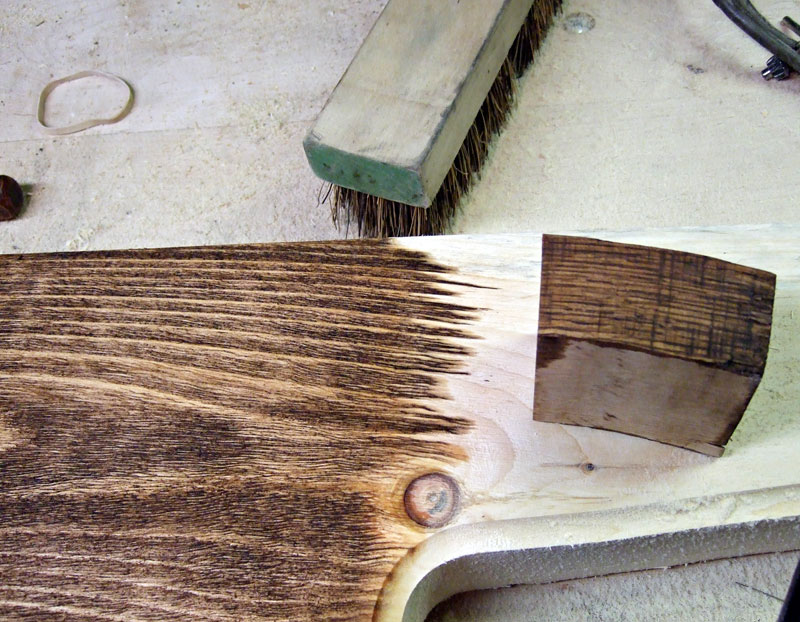
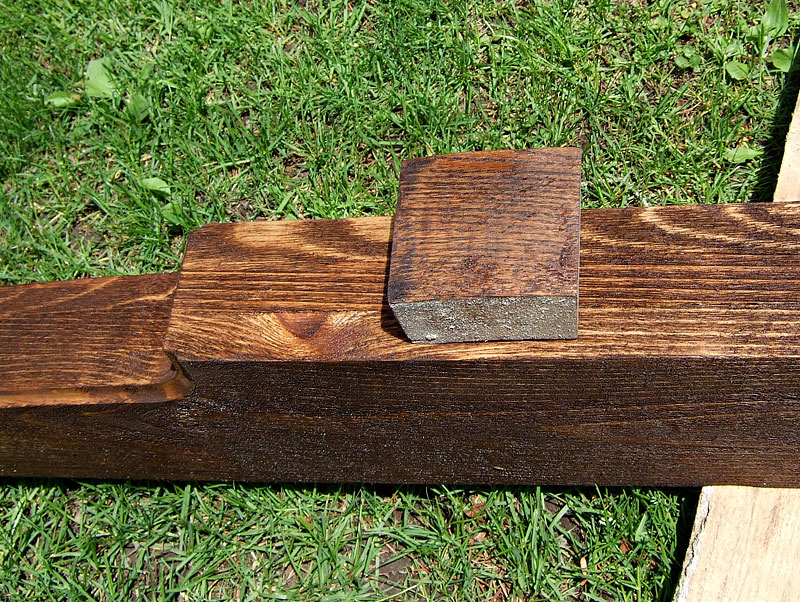
The block sitting on the beam is a piece of the oak with just Special Walnut applied. While not identical, I think the brushed and two-tone stained pine is as close as pine can be made to be. Here’s a closeup of a finished beam outdoors in the sun. Again, not identical but reasonably close.
5/22/09
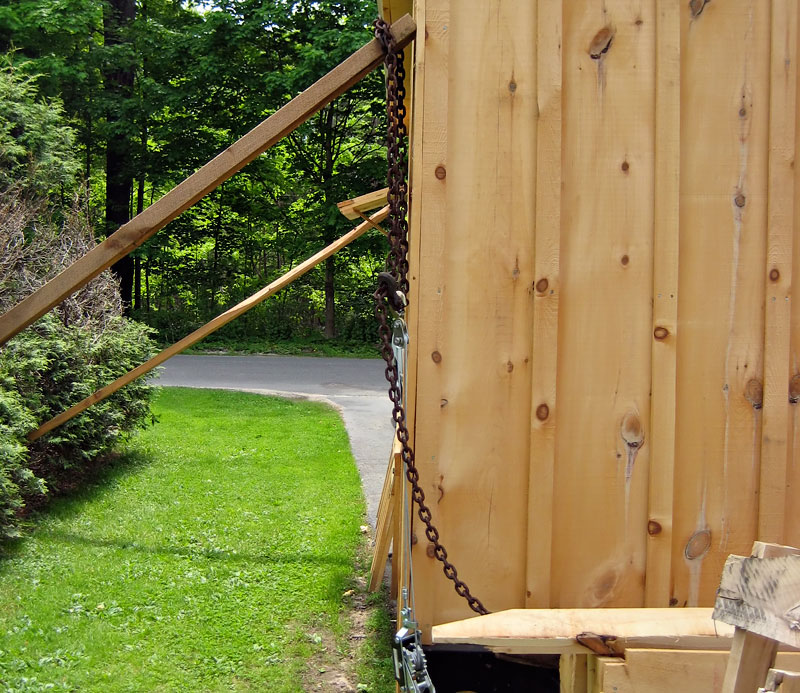
So. Dad decided that the door was not happening, and is building a new one. It will be better than the original, for sure, but it will take up yet more time. Sigh. Anyway, in the process of fitting the jamb we discovered in quantitative terms what I had long suspected in qualitative terms. Farmer William neglected to level the flatbed before construction, or at the very least, did so poorly. The building is not plumb in two dimensions. Below you will see my hairbrained scheme to correct the problem in one dimension. Thank the gods for the shrubbery. As long as the braces are in place, the side walls are dead vertical. I’ll leave them in place for awhile in hopes that the building will settle into its new shape. Hopefully the enormous tension will not give way catastrophically and decapitate any neighbor children. The new beams were installed after this maneuver, so they may help keep it this way to a degree, but I’m dubious. The long dimension isn’t as bad, thankfully. It can damned well stay the way it is.
Speaking of the beams, here they are in all their splendour. It takes a bit of imagination to envision the finish-work that will slowly evolve around them. I leave this as an exercise for the reader.